
Enabling Mosquitto websockets on Synology NAS
Synology NAS:es are pretty capable devices. Let's look at how they can host a Mosquito MQTT broker.


Websockets are cool. They are the modern sibling of http in that they run over tcp, but websockets offer a lot more, most notably full duplex (i.e. data can be sent in both directions) and realtime delivery of messages.
Those two features enable the creation of web pages that update dynamically as soon as new data is available on the server. No need to reload the web page in the user’s browser.
I have been struggling with how to get websockets integrated with MQTT on my Synology DS1515+ NAS, but in the end it turned out to be pretty easy!
MQTT is another very cool concept/protocol. Loosely related to IBM’s Messaging Queue (MQ) protocol, MQTT focuses on messaging between small footprint devices (low processing power, IoT etc). While it can in some cases be used to keep information about system state, it is in the machine-to-machine communication area the protocol really shines.
Mosquitto is one of the leading open source MQTT implementations. It runs on most platforms, from small devices like Raspberry Pi, as well as Windows, OS X and most major (a few more niche) Linux distributions. I have been using it on and off for a year or two, with a lot more done through MQTT/Mosquitto during the past 6 months. It has in many ways become the nervous system in the home automation and monitoring system at home here – everything from weather forecasts, frost alerts, temperature and energy usage monitoring, status of computers and network devices, arrival/departures of people etc etc – all kinds of data lives in MQTT in a structured, easy to get to, way.
And here comes the good part: As of version 1.4 of Mosquitto, web sockets are natively supported.
This opens up to some pretty cool possibilities. For example, it is now possible to create live web pages that always show the latest temperature/energy/forecast/presence/… information – all retrieved from a single source (rather than all sorts of different databases, REST APIs, external web services etc). Very powerful indeed!
Thanks to the great work by the SynoCommunity project, Mosquitto is available for many Synology NAS models, current version as of this writing is 1.4.2-4. Websockets are however not enabled by default, it is however very easy to do:
1: Enable downloads
Enable downloads from the SynoCommunity repository, as described on their site.
2: Install Mosquitto
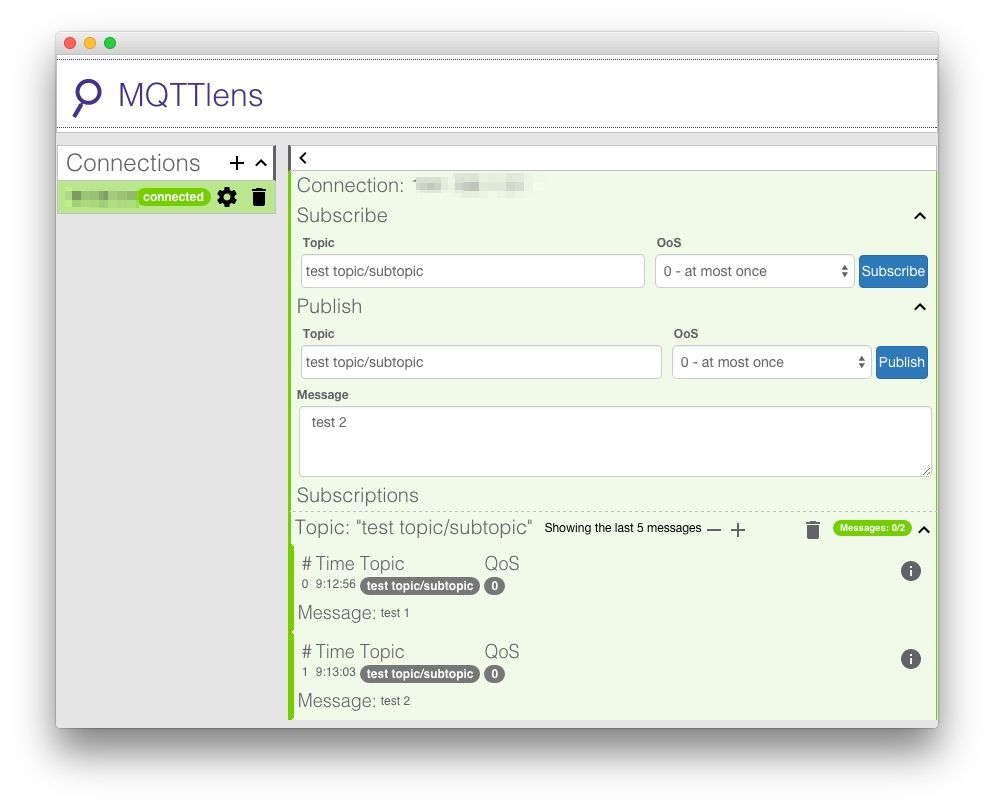
Install Mosquitto, verify it is running. It will by default listen on port 1883, you can use a tool like MQTTLens (available on Chrome app store) or similar tools to verify that your newly installed MQTT broker is working. Just connect the MQTT client to your Synology’s IP address on port 1883, and you should be able to send and receive MQTT messages.

3: ssh into NAS
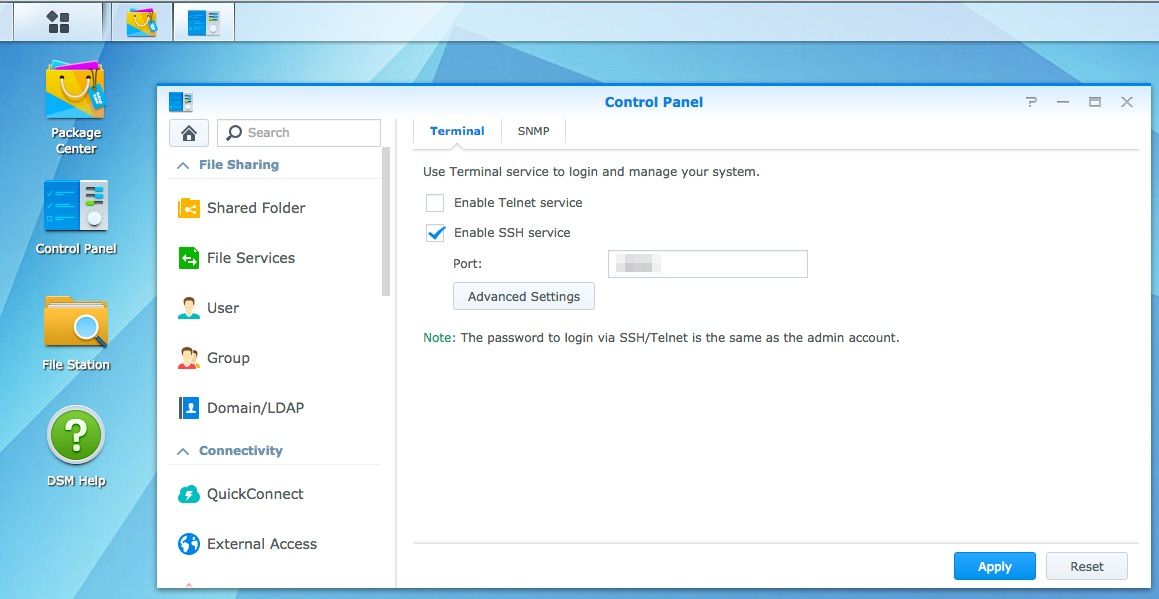
ssh into your NAS as root, or as a regular user and then switch to root. You will need to enable ssh in the NAS control panel to do this. You should consider using a non-standard port (i.e. not 22), as it will at least somewhat decrease the number of attacks you will see on the port (if your NAS is open to the Internet). You should of course also have strong passwords, public key pairs to log in etc etc…
4: Find Mosquitto config file
Let’s find out where the Mosquitto config file lives:
DS1515P> find / -name mosquitto.conf
/volume1/@appstore/mosquitto/var/mosquitto.conf
DS1515P>
5: Edit Mosquitto config
Edit the “Extra listeners” section of the Mosquitto config file. The VI editor is installed by default in the BusyBox shell (no VIM, Nano or similar – sorry..) so it reads something like this:
# =================================================================
# Extra listeners
# =================================================================

# Listen on a port/ip address combination. By using this variable
# multiple times, mosquitto can listen on more than one port. If
# this variable is used and neither bind_address nor port given,
# then the default listener will not be started.
# The port number to listen on must be given. Optionally, an ip
# address or host name may be supplied as a second argument. In
# this case, mosquitto will attempt to bind the listener to that
# address and so restrict access to the associated network and
# interface. By default, mosquitto will listen on all interfaces.
# listener port-number [ip address/host name]
#listener
listener 9001

# The maximum number of client connections to allow. This is
# a per listener setting.
# Default is -1, which means unlimited connections.
# Note that other process limits mean that unlimited connections
# are not really possible. Typically the default maximum number of
# connections possible is around 1024.
#max_connections -1

# The listener can be restricted to operating within a topic hierarchy using
# the mount_point option. This is achieved be prefixing the mount_point string
# to all topics for any clients connected to this listener. This prefixing only
# happens internally to the broker; the client will not see the prefix.
#mount_point

protocol websockets
6: Sample Mosquitto config
Sample Mosquitto config files are found in the /usr/local/mosquitto/etc/mosquitto/ directory, they are very useful if you want to add additional features like security to your Mosquitto setup.
7: Restart Mosquitto
Restart Mosquitto from the package center app in the Synology web UI, and you are good to go. You now have a websockets enabled MQTT server.
More to come on this topic, I suspect.. got some neat ideas brewing.
If you want to read up on MQTT and Mosquitto, I recommend Jan-Piet Mens’ blog, lots of great posts about MQTT, advanced DNS usage and other goodness.