Posting to Slack from Qlik Sense load scripts - web service style (part 2)

As the first version of the Sense-to-Slack integration required you to lower the Sense security level, it is probably not a good option for enterprise Sense users, for example.
Instead, let’s set up a small node.js web service, which exposes an API that we can call just like we can retrieve data from any web page in the load script.
There are a couple of pre-requisites:
- Node.js must be installed on the machine where Sense is running (or some other machine in your network – for sake of simplicity I assume it’s on the same machine). You also need to have the Node libraries Restify and Node-Slack installed.
- You also need Qlik’s REST connector, at least if you are to avoid some messy URL character encodings. More on that later.
Setting up the Node.js server
Create a directory where you will store your Node apps. C:\node or something similar – you decide what’s suitable on your system. Then, get the code for the node server from GitHub. The code is pretty basic (make sure to use your own Slack web hook URL):
var restify = require('restify');
var Slack = require('node-slack');

var slackWebhookURL = '<fill in your web hook URL from Slack>';
var slack = new Slack(slackWebhookURL);

function respondSlack(req, res, next) {
// console.log(req.params);

slack.send({
 text: req.params.msg,
 channel: req.params.channel,
 username: req.params.from_user,
 icon_emoji: req.params.emoji
 });

res.send(req.params);
 next();
}

var server = restify.createServer({
 name: 'SlackProxy'
});

server.use(restify.queryParser()); // Enable parsing of http parameters
server.get('/slack', respondSlack);

server.listen(8080, function() {
 console.log('%s listening at %s', server.name, server.url);
});
Run the server:
C:\node\slack_proxy>node slack_proxy.js
SlackProxy listening at http://[::]:8080
Log Slack entries from Sense load script, using the REST connector
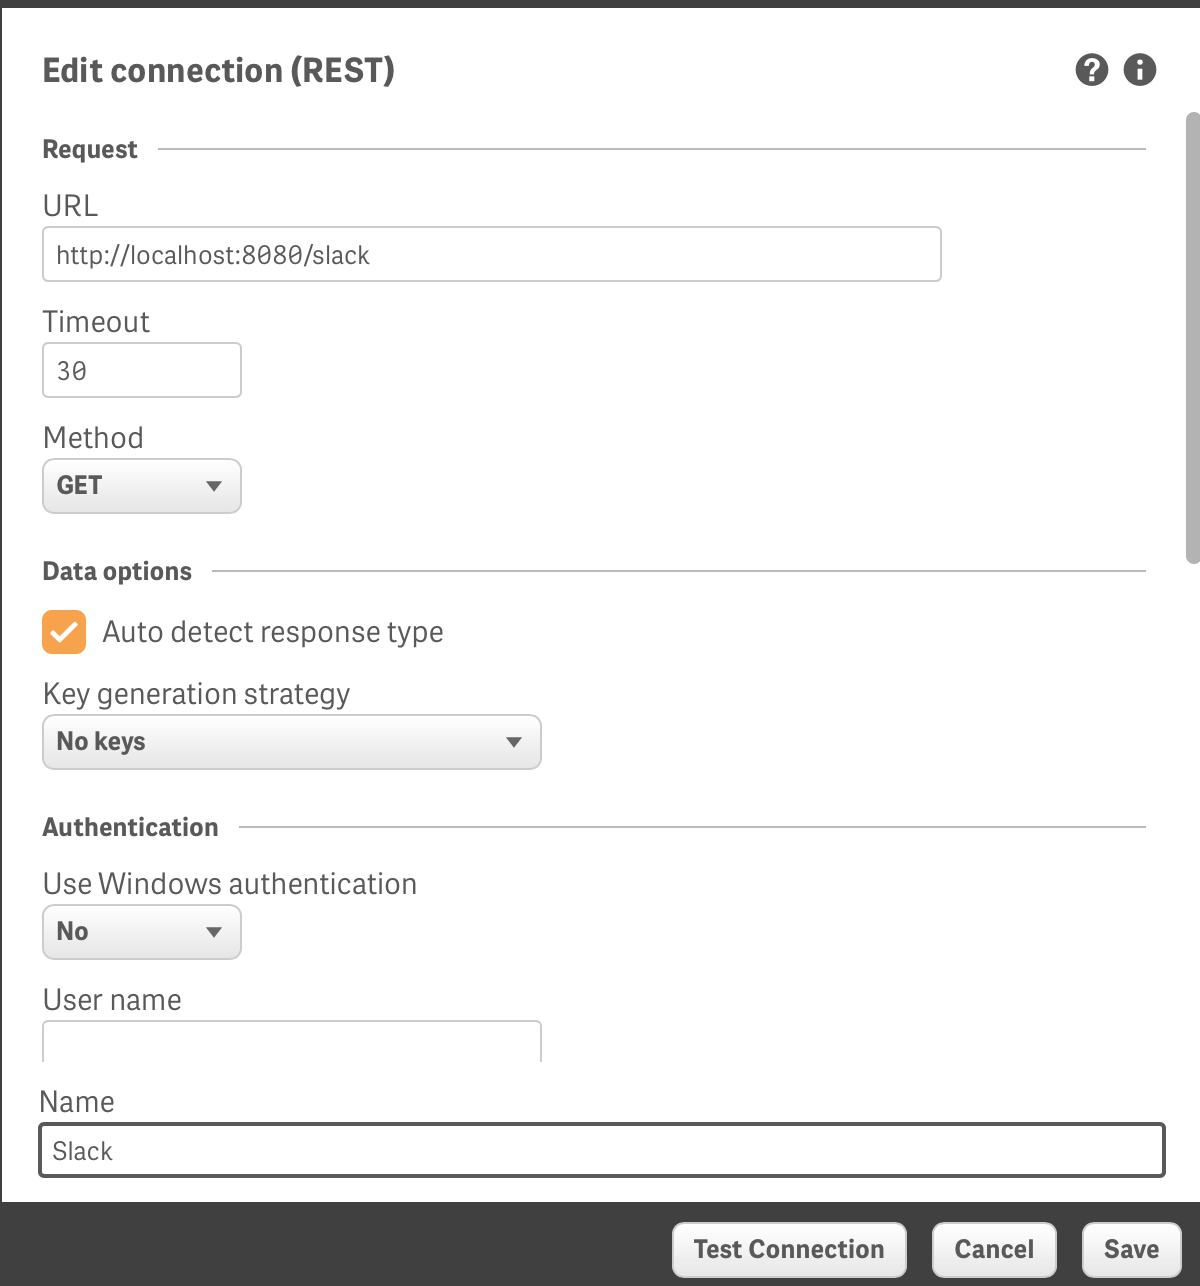
Now, create a new Sense app to try out the notification. In that app, set up a new data connection using the REST connector:
With the new connection in place, use the rest connector to connect to the proxy, and let the REST connector generate the code for you.
Finally, add the “WITH CONNECTION”… statement to send in the actual data that should be passed on to Slack. A good thing here is that the REST connector handles encoding of special characters like space, # etc – no need to do that manually. Very nice!
The resulting load script looks something like this (your data connection names will differ, of course):
LIB CONNECT TO 'Slack';
RestConnectorMasterTable:
SQL SELECT
"channel",
"from_user",
"msg",
"emoji"
FROM JSON (wrap on) "root"
WITH CONNECTION (
QUERY "channel" "#general",
QUERY "from_user" "SenseBot",
QUERY "msg" "Posted from Sense",
QUERY "emoji" ":smile:"
);
Slack:
LOAD
[channel] AS [channel],
[from_user] AS [from_user],
[msg] AS [msg],
[emoji] AS [emoji]
RESIDENT RestConnectorMasterTable;
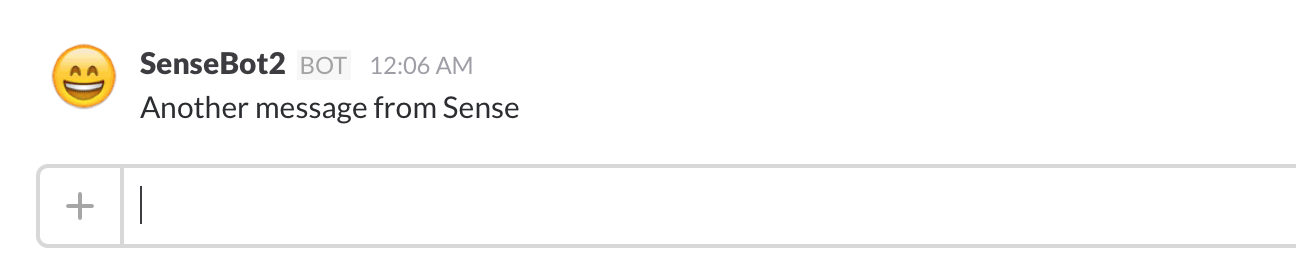
DROP TABLE RestConnectorMasterTable;Reload the app, and voila – in Slack we get this:

Mission accomplished.
Log Slack entries from Sense load script, using the FROM command
If you don’t want to use the REST connector, or don’t have it installed, there is another way of achieving the same result as above.
Your Sense load script will instead look something like this:
Slack:
LOAD
 *
FROM [http://localhost:8080/slack?channel=%23general&from_user=SenseBot2&msg=Another%20message%20from%20Sense&emoji=:smile:]
(txt, codepage is 1252, embedded labels, delimiter is '\t', msq);
Notice how we have to convert space, # and other “special” characters to their hex equivalents? You could write a small function that does this for you (don’t think Sense has any built in function for URL escaping – or?), but with the REST connector being so easy to use – that should be the preferred option for most people.
In this case we get a Slack message like this: